
Spoti LMS Groups give you the ability to group certain users together and assign a Group Leader who can track the progress and performance of any user in their group. Groups can have any number of courses associated with them, and anyone in that group will be automatically enrolled into the course(s).
Content
Creating a Group
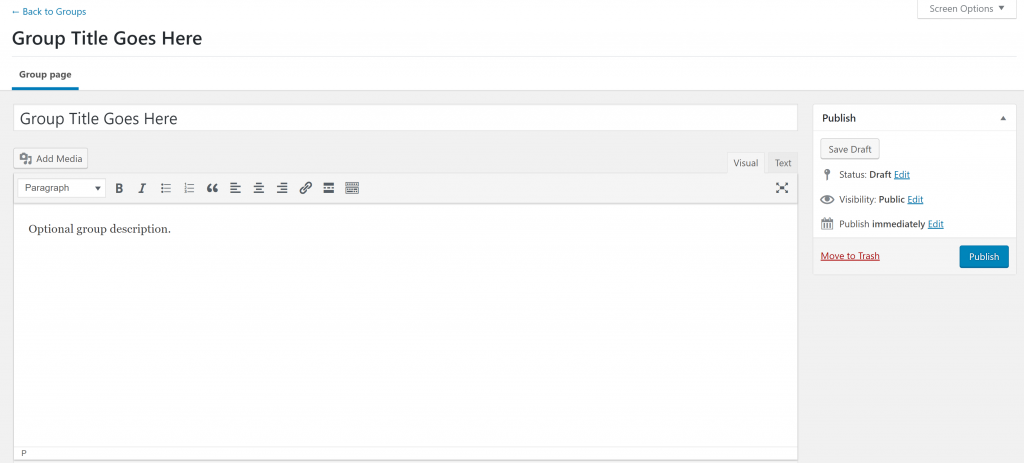
- Navigate to SPOTI LMS > GROUPS
- Click Add New
- Give the group a title
- (Optional) Give the group a description
NOTE: Description is for internal use only
Adding Courses to a Group
Once you have created a group, you can now assign courses to it. When a course is assigned to a group, any user who is in the group will automatically get enrolled into that course. There are no limits on the number of courses that can be associated with a group. Courses can also be associated with multiple groups.
- Still on the Edit Group page…
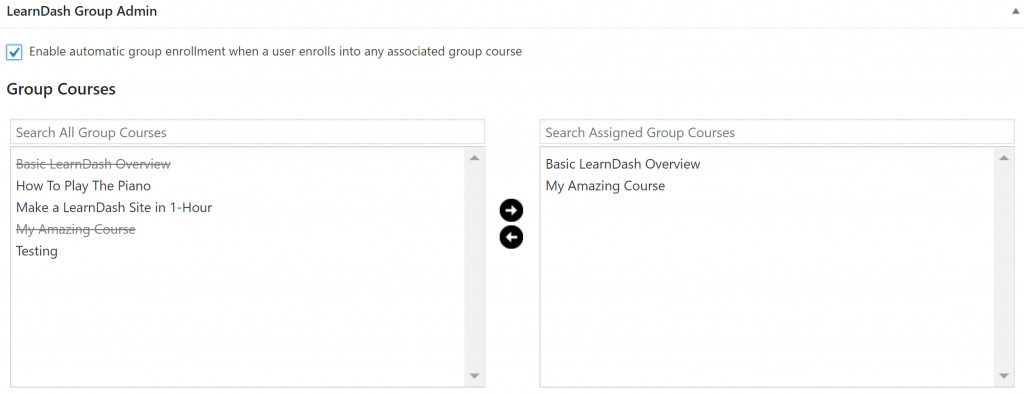
- Scroll down to the Spoti LMS section
- If you want users to be automatically added to a group upon course enrollment, select the Enable automatic group enrollment when a user enrolls into any associated group course checkbo
- Choose the course(s) you want to add to the group by clicking on the course title. Hold CRL (CMD on Mac) to select multiple courses at once.
- Click the right arrow to move the course(s) into the Assigned Group Courses window
Assigning a Group Leader
After you have added courses to the group, you must select a Group Leader. There are no limits on the number of Group Leaders that can be assigned to a group, but it must have at least one.
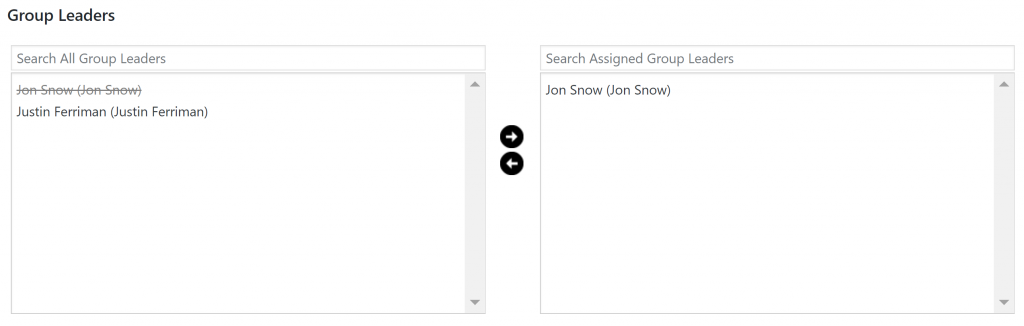
Assigning a Group Leader to a group is the same process as when you assigned courses.
- Still on the Edit Group page…
- Scroll down to Group Leaders
- Choose on the user(s) you want to add as Group Leaders by clicking on their name. Hold CTRL (CMD on Mac) to select multiple courses at once.
- Click the right arrow to move the user into the Assigned Group Leaders window
About the Group Leader User Role
Group Leader is a user role included in LearnDash. It adds the ability to…
- view reports on course progress for any user in the group
- view reports on quiz performance for any user in the group
- send email messages to the entire group
Creating a Group Leader
Before you can assign a Group Leader, you have to grant the Group Leader user role to the desired users. After doing so, they will appear for selection when you create your group.
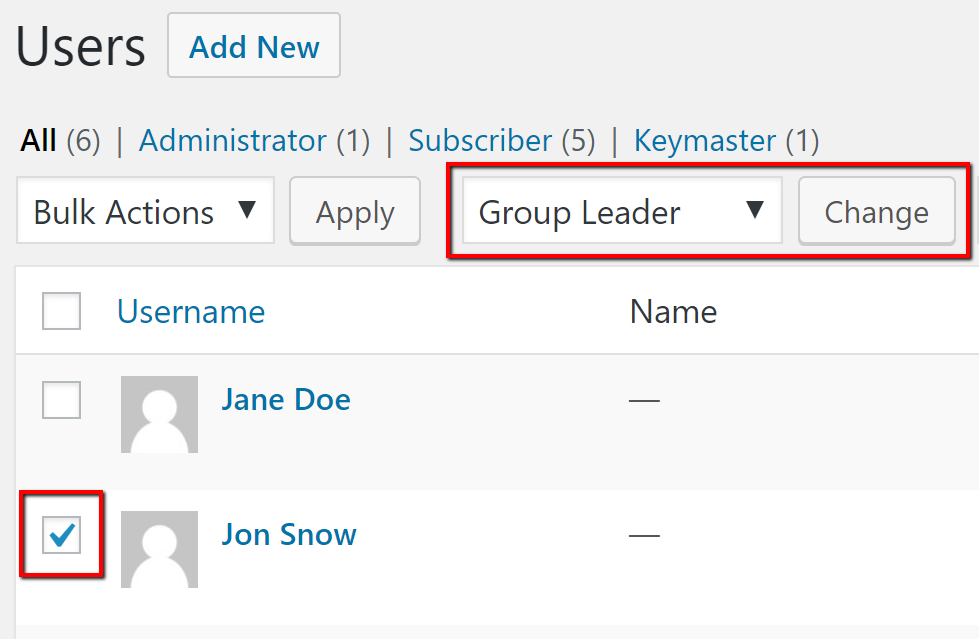
- From your WordPress admin dashboard, navigate to USERS > ALL USERS
- Select the checkbox next to the desired user(s)
- From the Change role to… dropdown menu, select Group Leader
- Click Change
Adding Users to the Group
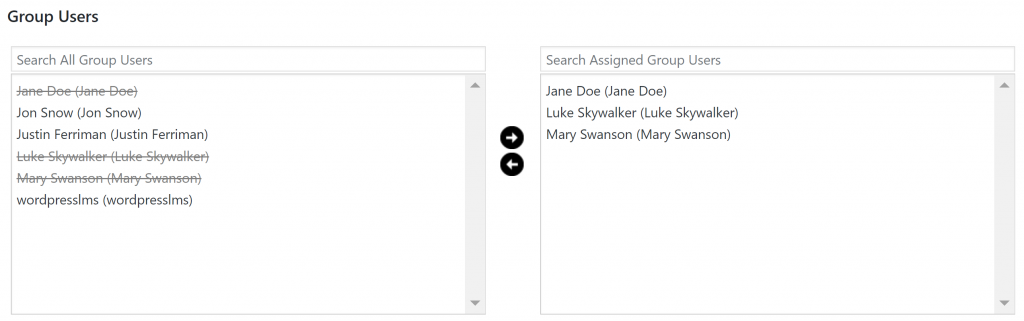
Adding users to your group is similar to how you added courses and Group Leaders.
- Still on the Edit Group page…
- Scroll down to Group Users
- Choose the user(s) you want to add to the group by clicking on their name. Hold
CTRL(CMDon Mac) to select multiple courses at once. - Click the right arrow to move the user into the Assigned Group Users window
Publishing the Group
When you are ready for the group to be created, simply click the Publish button. Once the group is published, users of the group get enrolled into any course associated to that group. If you do not want users to get access to the courses, then click the Save Draft button instead.