
The course page content area is where you add a course title, description and featured image for your course. This is what people will see before they enroll (or purchase) the course.
Spoti LMS will automatically add a course content table with a list of lessons, topics & quizzes associated with the course below your course description. Course page content is your own custom information that will be displayed as soon as the page is loaded, immediately underneath the “Course” tab.
Content
Where to Add a Course Page Content
- Navigate to SPOTI LMS > COURSES
- Click on the course you’d like to edit
- You will automatically land on the Course page tab
- You can immediately start adding your course description
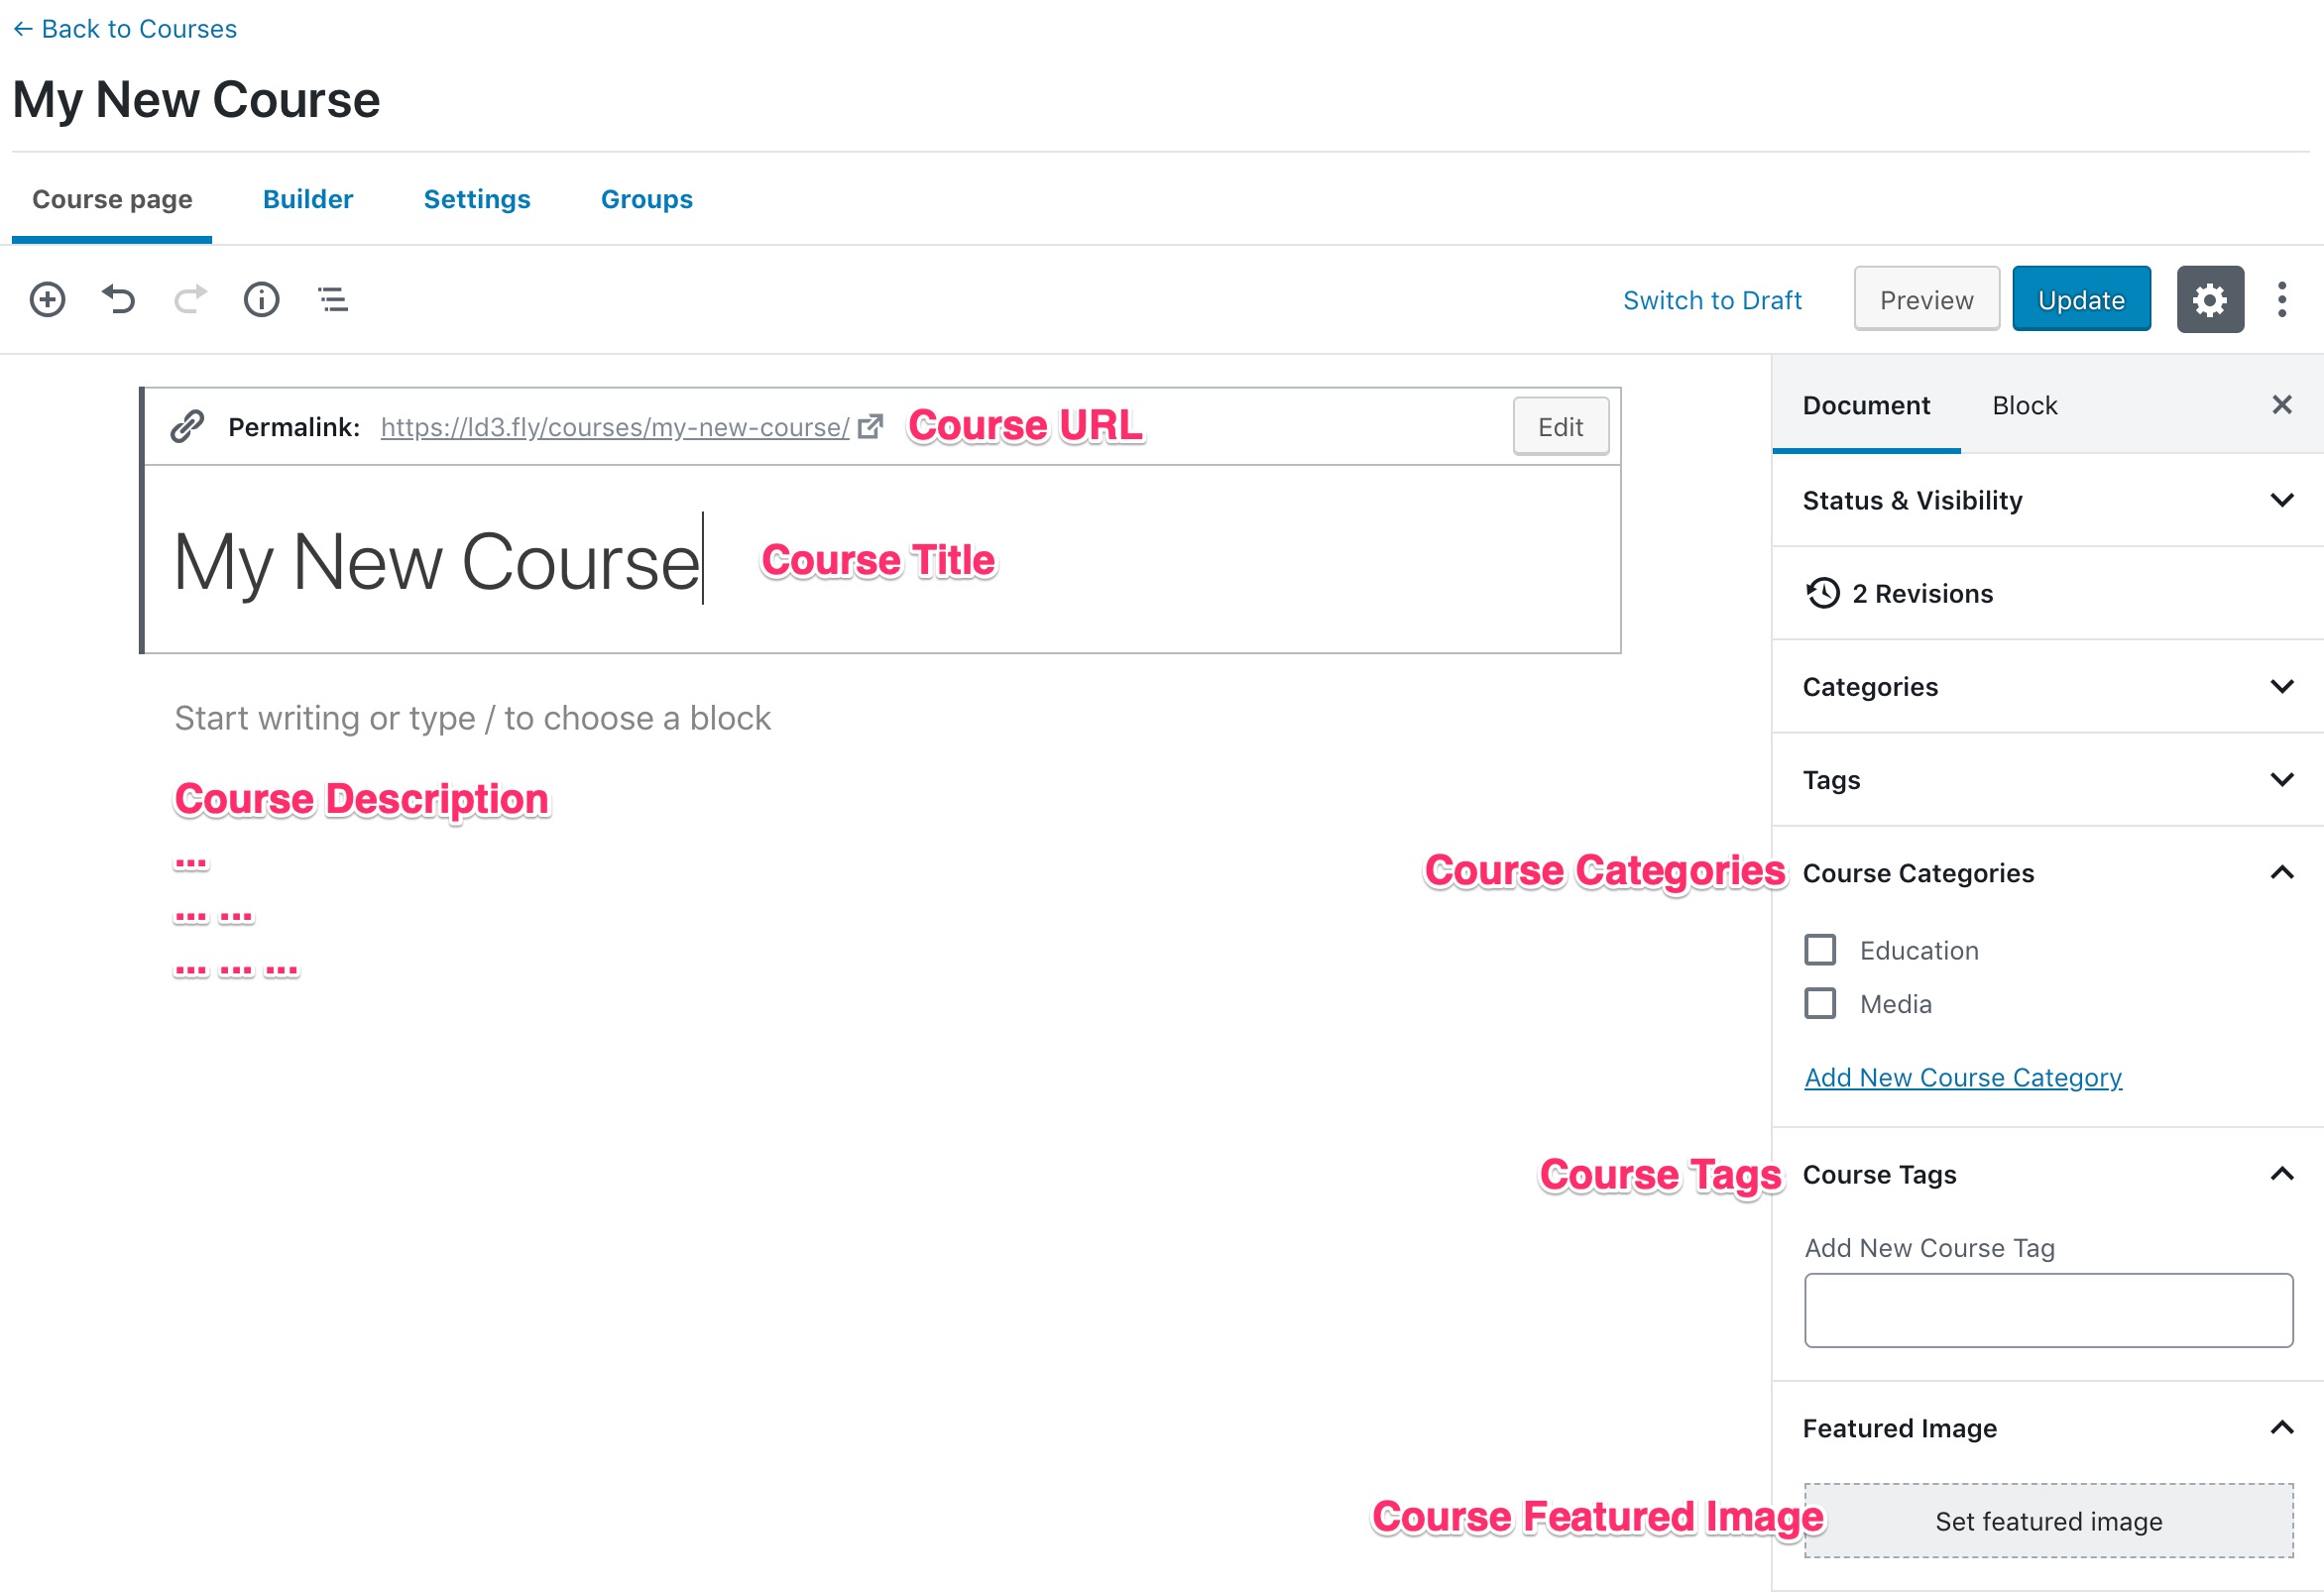
Course Title
Your course title is the first thing you’ll see at the top of the editing screen. Look for a placeholder that says “Add Course title.”
Most themes display the course title near the top of the page, below your header and/or global navigation.
Course URL
When you click inside of the “Add Course title” box, you’ll see an area appear above, labeled “Permalink.” This is your course URL.
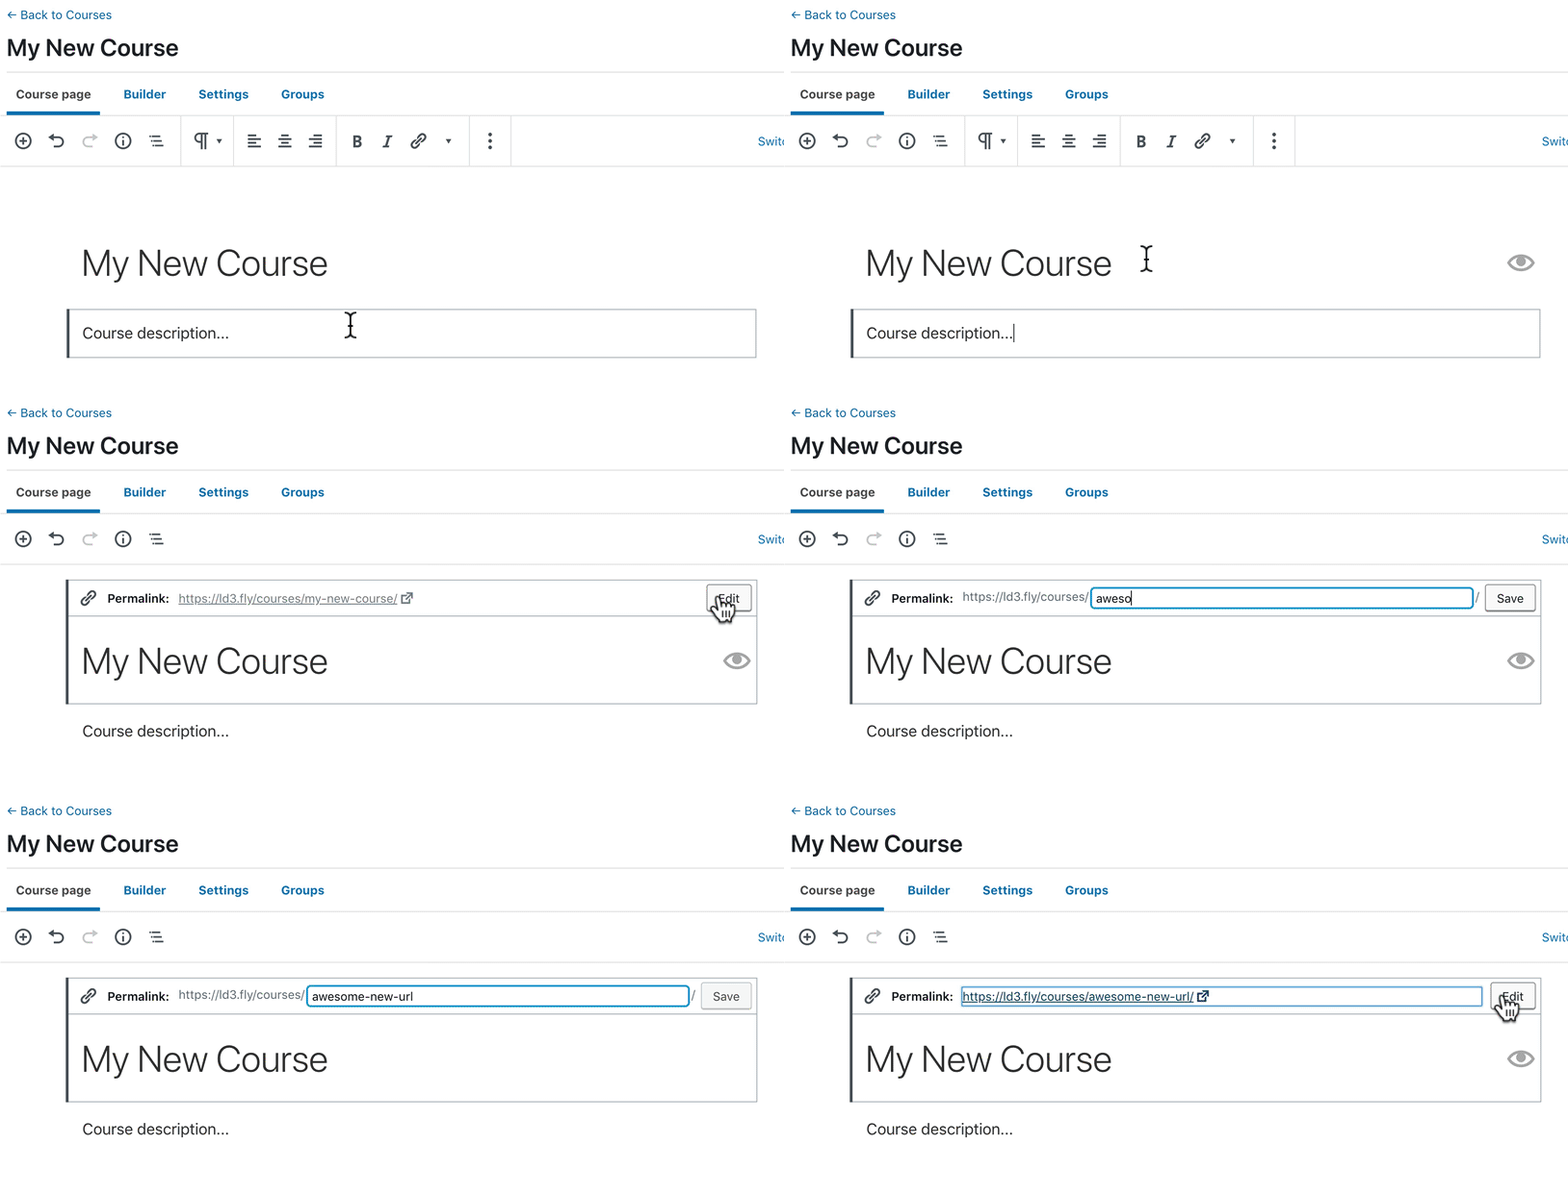
You can edit the third part of the URL:
https://yoursite.com/courses/your-course-permalink/In most cases, this should be a reflection of your course title.
- Click into the “Title” area, as if you were going to change your course title
- Click the “Edit” button next to the permalink
- Type your new permalink
- Hit Enter, or click the Save button
Course Description
Everything below the course title is a blank canvas for you to add your description. This is powered by the same WordPress editor used for pages, blog posts and other content types in WordPress.
Shortcodes & Blocks
Spoti introduces a number of shortcodes & blocks for you to use in this area. You can add a payment button, show or hide content based on a user’s access, insert a course progress bar and more.
Featured Image
The featured image is the main image associated with your course. Most WordPress themes will display this image near the top of your course page. It’s also the image we’ll display if you’re using the course grid add-on.
- Look for the Featured Image panel in the sidebar (make sure you’re viewing Document settings, not Block settings)
- If it’s not already open, click on it to open it
- Click Set featured image
- Choose an image from your Media Library, or upload a new one
- Click the Select button at the bottom